
Okay, see this hanging garland backdrop here? Would you believe me if I said my HUSBAND made it?! That’s right, folks. My husband took the reins on this bad boy and made it for my baby shower! Amazing, right?! He’s not necessarily Mr. DIY, so I was quite impressed by this. Wanna know the best part of all? It was SUPER simple, and inexpensive! And it’s such a unique and beautiful piece- I actually decided to keep it up after the shower as a wall decor. It’s quite the talking piece. Today I’m gonna share the little tutorial on how it was made, in case you’re looking for a cute piece for a shower or party or hey, just some new decor. ;)

HANGING GARLAND TUTORIAL
MATERIALS:
BIRCH BRANCH (HERE)
FAUX FOLIAGE GARLAND (HERE, HERE AND HERE)
FAUX FLOWERS (HERE, HERE and HERE)
TWINE
If your foliage garlands are too long, just cut to the length you want. Ours are about 38″ each. Some a little shorter, some a little longer. The branch we have is almost 5 feet long.
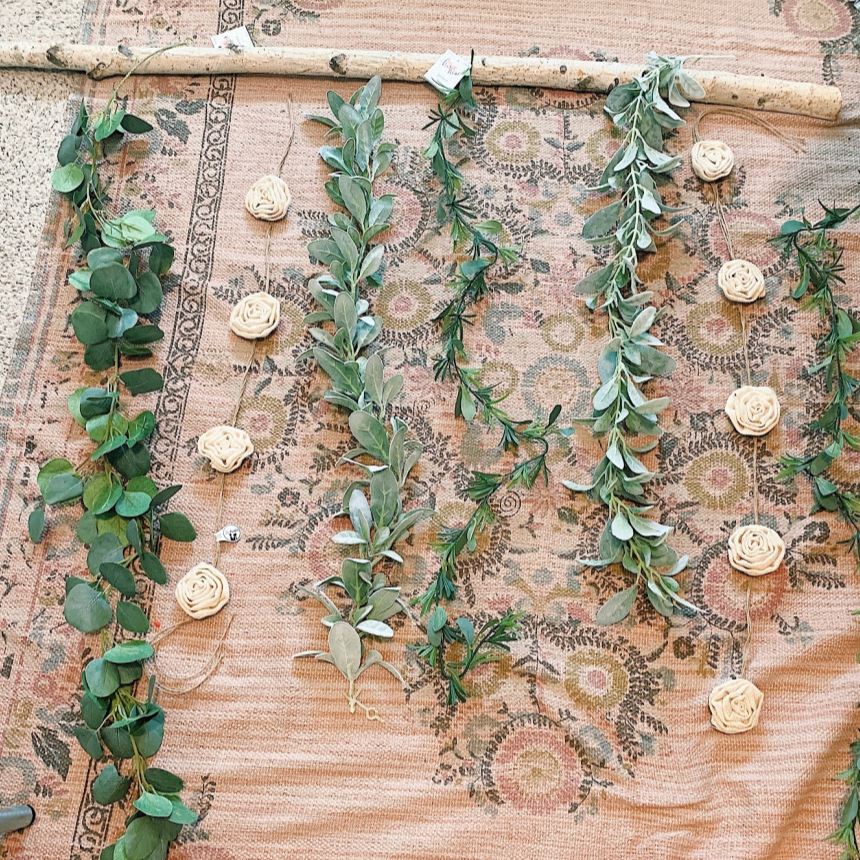
Lay everything down on the ground and rearrange until it’s how you like it. We decided to leave one side of the branch bare. Mix the foliage however you like, and when it’s in the order you like, tie each strand of foliage around the branch with twine, and double knot so it’s secure.
Take a long piece of twine and tie each end to the branch, then the middle of that twine is where you are going to hang it to the wall (we just hung it from a nail).

And that’s it!!! See. Told you it was easy! ;) If you end up using this tutorial and making your own, I would LOVE to see! Tag me on Instagram so I can see them! And happy DIY-ing, my friends!
xo
Leave a Reply