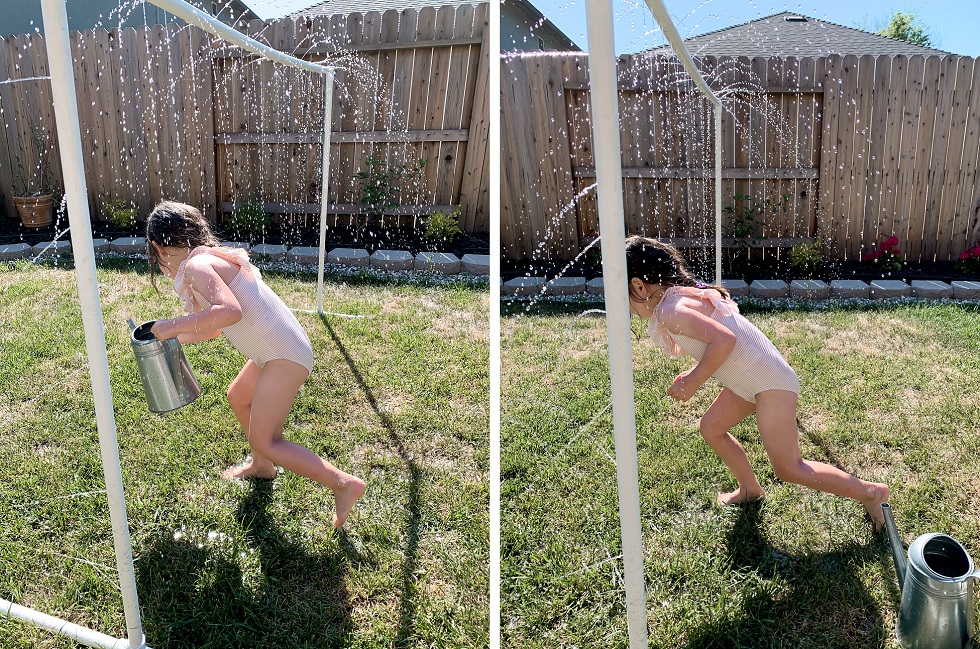
Zack made this really cool water feature for the kids last week and I thought I’d share how he did it! If you have the tools, the other supplies only cost like $25! Plus, it’s very lightweight and pretty mobile, so you can move it all around the grass and use it like a sprinkler to minimize water waste!
The blog post will have the full details and links in the text, but here’s all of the supplies needed for quick reference:
This tutorial is how to make the exact one Zack made, but once you have the PVC and fittings, you can get creative (especially if you get a few extra fittings) and make whatever design you want!
Note: the ball valve is optional. We use it to further reduce water waste. If the kids are more interested in the other section for an extended time, we turn the valve to shut off the overhead feature.
Step 1- cut your PVC into the following lengths:
Cut them IN ORDER that you see them here so you ensure you’ll use exactly 4 poles.
POLE #1 – Cut exactly in half to make 5-foot pieces then cut those in half for FOUR 2.5-foot pieces.
POLE #2 – Cut exactly in half to make 5-foot pieces then cut those in half for FOUR 2.5-foot pieces.
POLE #3 – Cut ONE 2.5-foot piece, ONE 3.5-foot piece and ONE 4-foot piece.
POLE #4 – Cut ONE 4-foot piece, ONE 4.25-foot piece, TWO 0.75-foot (9-inch) pieces and ONE 4-inch piece.
After cutting, you should have:
(9) 2.5-foot pieces
(1) 4.25-foot piece
(2) 4-foot pieces
(1) 3.5-foot piece
(2) 0.75-foot (nine inch) pieces
(1) 0.25-foot (4-inch) piece
This will be exactly 40-feet, which is (4) ten-foot PVC poles. Again, if you’re thinking of playing around with your own designs, I’d grab another pole or two- they’re less than $2 each.
Step 2- Build the bottom square
– Make square using (8) 2.5-foot pieces, four tees and four elbows. Each side will have a tee in the middle and an elbow on each end.
– Point 3 of the tees with the opening facing up and one facing out the side (this will be your hose connection)
– Attach your hose adapter to the PVC tee facing to the side. We’ll call this the FRONT of the square.
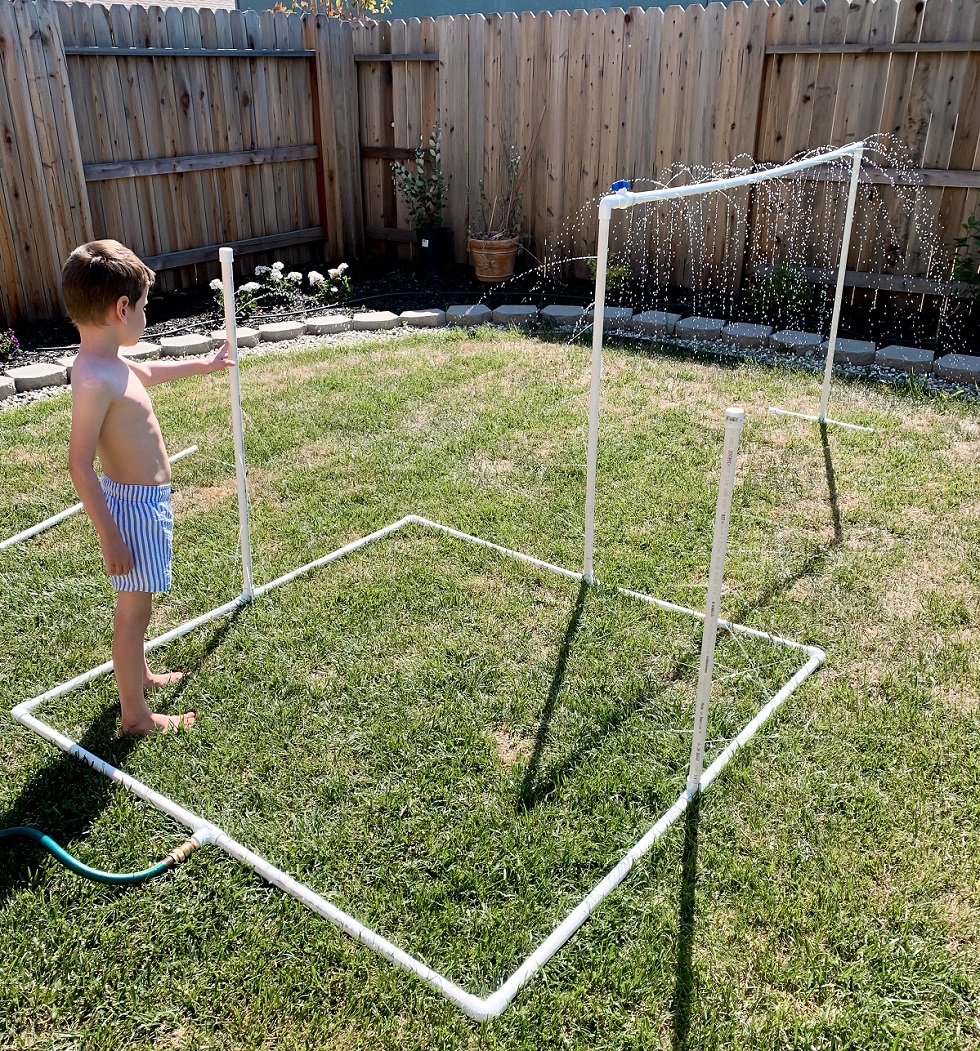
Step 3- add the water poles to the square
– Add a 2.5-foot pole to the tee on left side of the square and a 3.5-foot pole to the tee on the right side.
– Put a PVC cap on the top of each of these poles.
Step 4- Build the overhead part
– Attach one 4-foot pole to the back of the base square.
– Put an elbow at the top of that piece facing directly away from the square.
– Connect the 4-inch piece to the elbow and the other side to the ball valve.
– Connect the 4.25-foot piece to the other end of the ball valve and put an elbow facing down on the end.
– Connect the other 4-foot pole to the down-facing elbow.
– Put a tee on the bottom of that pole with two sides facing out perpendicular to the pole going across.
– Attach a 0.75-foot (nine-inch) piece to each end of the tee and cap those ends. These pieces are used to stabilize the structure.
Step 5- drill your holes
You get creative license here! Zack just drilled random holes all over the pipes at different angles. The key here is using a 1/16th drill bit to make the holes as small as possible!
He did about a hole every 1-2 inches. He did NOT drill any holes on the bottom part of the square, or on the upright poles for the overhead feature. Aim low for quantity to start- you can always drill more holes, but you can’t un-drill them!
Adjustments
Our kids are all under 4-feet tall. If you have bigger kids, you’ll need more PVC, as you will need to make the overhead feature taller. If you do that, you should also make the 9-inch stabilizing pieces a bit longer as well.
You could also make more poles coming out of the square. You’ll just need a bit more PVC and another tee for each one you add.
You could use cut up foam noodles, or rope to hang from the overhead feature to make it more interesting.
If somehow you have INSANE water pressure, you may need to bond the connections with PVC cement. I wouldn’t do this at first because it takes away the portability of it. Just make sure your connections are pushed in as much as possible and it should be fine.
This turned out to be SUCH a hit with the kids! It was also SO inexpensive- and easy to build. Anytime Zack builds something, you know it’s easy! ;)
My kids would play in this for sure, but I actually think my puppy would love it the most. What a fun project to make as a family. It looks pretty easy too.
Ha, yes!!! Great for animals too! ;)
xo